[Old] Building your Integration
Please review the basics of Custom Blocks as our Integration Platform is an extension of this functionality. For more read here
Building your Integration
This guide will take you through the steps to building out your integration and publishing through the Tapcart Integration Hub. Follow these steps to create an engaging and functional integration for your merchants.
Step 1: Access Custom Blocks:
First, log in to your Shopify store where Tapcart is installed. Remember this store should be one owned by your company and not a merchant's store.
Navigate to Tapcart's Custom Blocks directly or access it via the Home screen, PDP, or Cart screen where in the left hand side of the UI you should see a tab labeled "Custom Blocks" that will give you access to the code editor.
Step 2: Develop Your Integration:
Utilize the custom block code editor to develop your integration. Ensure it meets the needs and expectations for customer use. For a comprehensive understanding, refer to the Custom Block Overview Documentation.
Step 3: Configuring your block for scale
While creating your integration, consider these critical areas to ensure adaptability and consistency across different merchants.
- Merchant Integration Settings
These settings involve API keys and other necessary information merchants provide to connect with your services. This data enables your integration to validate and render the correct user experiences. Merchant's will provide these settings when activating your integration in Tapcart.
Accessing Integration Settings: Example key structure: Tapcart.variables.integrations.intPartner.api_key
Example snippet:
function init() {
  window.IntPartnerSDK.initialization({
    intPartner_api_key: Tapcart.variables.integrations.intPartner.api_key,
    intPartner_slot_id: Tapcart.variables.integrations.intPartner.slot_id,
    },
  })
}
- Tapcart Theme Settings
To maintain a consistent look and feel across different merchant apps, leverage Tapcart's theme settings. These settings include colors, typography, and iconography, which should be utilized in your integration.
Accessing Theme Settings:
Example key structure: Tapcart.variables.theme.tokens.colors.textColors.primaryColor which returns the hex value of the Primary Text Color
Example snippet:
 document.getElementById('color-title').innerText = Tapcart.variables.theme.tokens.colors.textColors.primaryColor;
//sets the Title Color to the merchants Primary Text Color set in Tapcart's BrandKit
- Screen Level Configurations
These are configurations that you define in the Custom Block editor which allow merchants to add context to your integration such as setting a desired sort algorithm (i.e. Best sellers vs Recently Added) that allow the block to specify how your block behaves on a particular screen within the app. They are combined with merchant integration settings to render the desired experience. Screen level configurations are optional however if your block supports different layouts this is highly recommended.
While building your block you will see the Merchant Inputs tab (shown below) which offers a structured way to describe the data your collecting.
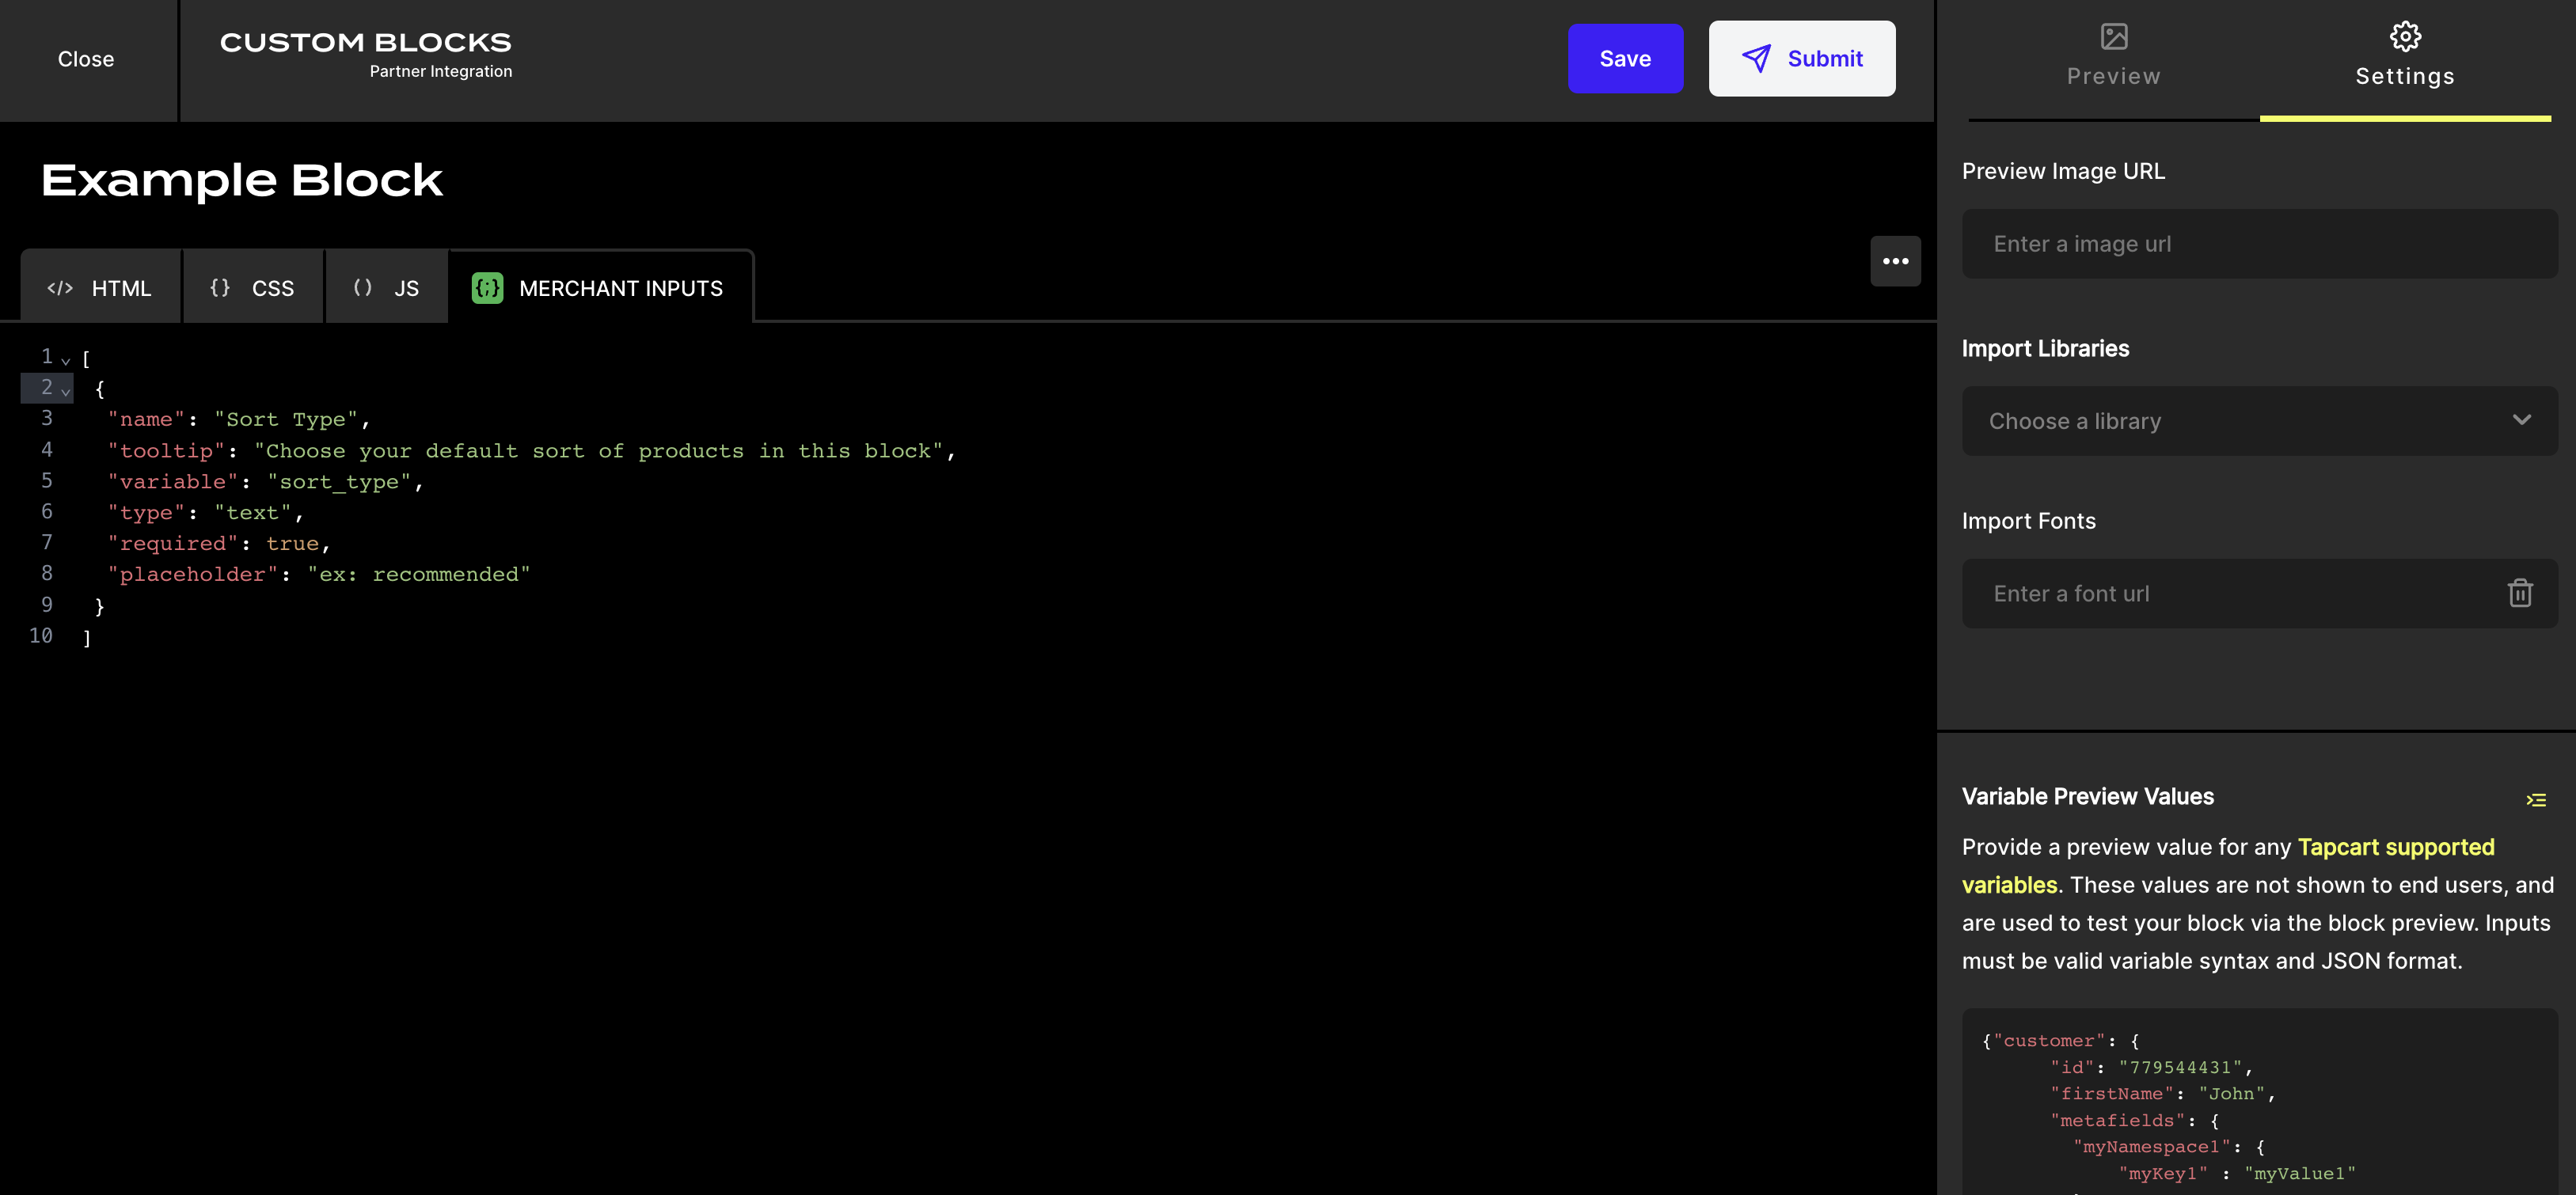
| Field | Field Description | Example | Required |
|---|---|---|---|
| Name | The name of the data your requesting from the merchant | Sort Type | Yes |
| Tooltip | A brief description of what your seeking from the merchant | Choose your default sort of products in this block | No |
| Variable | The key you'll call for in your integration | sort_type | Yes |
| Type | The type of input field. Two options: text or toggle | text | Yes |
| Required | Describes wether this field is required by the merchant or optional (true/false) | true | Yes |
| Placeholder | If type= text than placeholder text visible to merchants in the field before they begin typing | Options: Best Sellers, Recently Added, Relevance | No |
You can add unlimited number of fields (required or optional) but each field you add must describe all the data in the object. Below is an example of this as you'd describe in the code editor:
[
  {
    name: "Sort Type", //Name to show Merchants
    tooltip: "Choose your default sort of products in this block", //Tooltip to show Merchants
    variable: "sort_type", //Variable to access in Integration Block code
    type: "text",  // text or toggle
    required: true,  //true or false
    placeholder: "ex: recommended" //Placeholder Text Visible to the Merchant before they type
  },
  ...
]
Once this structure is followed the merchants will see a modal in the Tapcart platform to configure the data needs as shown below.

You can then call your variable in your block Javascript code through the same variable structure: Tapcart.variables.sort_type
let sortType = Tapcart.variables.sort_type;
//sets the Sort Type to the merchants input for sort_type variable
Step 4: QA'ing
- If you are using variables in your block, make sure to mock relevant test values in the Variable Previews Values JSON panel in Block Settings before you get started. This will give your block something to reference for any used variable.
- For preliminary tests mid-development, use the editor preview combined with the console to iteratively to check your changes.
- Try to ensure your block is working completely as expected in the editor preview before moving on. If using actions, make sure that interactions in the preview, result in actions being printed to the console. This means it’s working as needed for the app to accept it.
- If your app is not live, you can immediately place you block on a page & test via TestFlight or APK. If you need either make sure to reach out to your Tapcart point of contact. If you have an Apple Developer account, you can get a TestFlight run on your own app. If you don’t have an Apple Developer account, you can also receive an APK file to test on Android. If you don’t either, you will be placed on a one-off test app by Tapcart, where you will receive a generic app to test your block on. They may require additional setup.
- If your app is live, it’s recommended to place the block on the product page, and to conditionally tag the block to show only a single product. This diverts traffic from the block, while allowing you to use it in production. Make sure to use a test product, or one that receive little traffic & that can only be found in search.
- While testing your block, make sure to force quite & restart the app to receive any recent changes. Occasionally, a prior custom block may cache to your local device, leaving the block unable to receive new updates. To bypass this you can delete & reinstall the app, or wait 2-3 hours for a full reset.
Step 5: Submit your Integration Details
Before you integration can go live we need to collect some information that will help us merchandise your integration within our Integration Hub. Our integration hub is where merchants can discover and connect to your integration(s) and is where we collect the Merchant Integration Settings you call for in your block. An example is shown below
Please prepare the following information and submit it to this [form](https://teamtapcart.typeform.com/to/mcFdStak)
- Company Name
- Integration Type (i.e. Product Recommendations Block)
- Integration Summary
- Integration Benefits: 3-5 bullets of the value
- Image of the integration ( 100 by 100px)
Step 6: Submit for Approval & Publishing
Once you have QA'd your integration block you must submit your block for Tapcart's team to review and approve in order for it to get distributed to merchants through the Tapcart platform. During the review process, Tapcart will ensure your integration works well within the context of the mobile apps. The review process should be completed within 2 weeks at which point once approved your block will be live to all merchant's who have your integration activated on Tapcart. Merchants can add new integrations by visiting the Integration tab in their dashboard
Step 7: (Optional) Updating your block
After your integration block has been approved all future updates to that block can be saved and automatically published once live without a subsequent review thus be mindful of the changes you make. If you would like to have our team review the changes feel free to request that support from [email protected]
Updated about 1 year ago